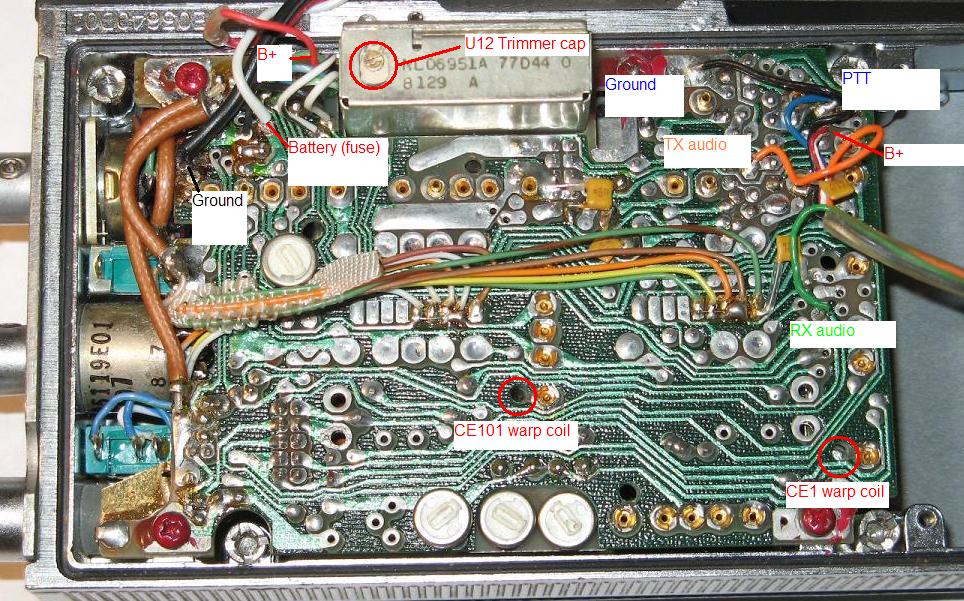
You can find a very nice copy of the MT500 Parts Catalog here (PDF), and Eric WB6FLY has been scanning all the manuals he can find and saving them here.
There are two basic designations, Basic and Universal. I think the difference is that the Universal models have a side connector for a speaker/mic and antenna, while the Basic only has the top-deck jacks for speaker/earpiece and antenna.
There are four versions, broken into two case sizes and styles:
| Omni | Slim-line | ||
|---|---|---|---|
| short | extended | short | extended |
| 6.97x2.73x1.85 | 7.62x2.73x1.85 | 6.97x2.73x1.59 | 7.62x2.73x1.59 |
That is, the Omnis are thicker than the Slim-line, and they both come in short and long cases. The thickness comes from the plastic tray that holds the antenna. Not clear why the length difference mattered to anyone; as far as I can tell, it just adds empty space in the case.
In addition, they could be had in 2W (H23) and 5W (H33) models. The Slim-line only came in 2W. You can tell a 5W by opening the back cover (four captive screws) and find a tall silver/chrome box near the PTT switch; this is the higher-powered output amplifier - there isn't room for this in the Slim-line body.
| H23BBB | H33BBB | H23BBU | H33BBU | |
|---|---|---|---|---|
| 2W | 5W | 2W | 5W | |
| Xmit current drain (15Vdc) | 420mA | 980mA | 440mA | 1000mA |
| Rcv current drain (15Vdc) | 70mA | 70mA | ||
| Standby current drain (15Vdc) | 11mA | 11mA | ||
It doesn't get easier. There are three VHF frequency ranges: 136-150.8 MHz, 150.8-162, and 162-174. There are internal board model numbers for each of these, and the frequency range is encoded in the overall model number (in theory):
| Digit | ||
|---|---|---|
| 1st | "H" | |
| 2nd | power output | 2 - 2 watts |
| 3 - 4 watts UHF / 5 watts VHF / 6 watts LB | ||
| 3rd | band | 1 - 25-54 MHz |
| 3 - 136-174 MHz | ||
| 4 - 403-470 MHz | ||
| 4th | B | |
| 5th | B | |
| 6th | model | B - basic |
| U - universal (see omni/slim-line...) | ||
| 7th | squelch | 1 - carrier |
| 3 - tone PL | ||
| 8th | 1 | |
| 9th | number of channels (1,2,4,5,6,8) | |
| 10th |
Where did UHF and LB come from? I have no idea. One of the tables just introduces it out of nowhere! I only have documentation for the VHF model.
The units use 'crystal elements' (also known as ICOMs in some circles, I don't know why) to set the operating frequency for each channel. These are a complete temperature compensated 3d overtone oscillator. For transmit, they always operate at 1/3 the final frequency; no confusion there. For receive, the IF is 17.9MHz, and depending on the range, you need either a 2x or 3x crystal element, because the board has either a doubler or a tripler in the injection path. This, despite the schematic, which always shows a tripler in the receiver injection path - the parts list shows a different receiver injection part U8: 5105177D43 for Low, 5105177D13 for Med/High. There is some implication that only the BBU board exists in a version that has the '1' or 'L' range (136-150.8), using a 2x CE.
There are different CEs for 2x use and 3x use, but it's not obvious from the parts list. Moto lists three part numbers:
| p/n | description |
|---|---|
| KXN1075A | Receiver, use as required depending on model |
| KXN1083A | Transmitter, 2W, use as required depending on model |
| KXN1042A | Transmitter, 5W, use as required depending on model |
The IC site also shows that the receive CE exists in two versions, even though Motorola only applied one part number - apparently you were meant to order by frequency only, and Motorola would do the rest.
The crystals themselves are in a HC-49/X package. Most of the crystal manufacturers will make these crystals, re-crystal your existing elements, or sell you 'new' elements to your specs. West Crystal seems to be the most clueful of the bunch, and has good prices, but even they weren't able/willing to change the range of a 3X CE to handle a 2X frequency.
Ed KD8KZ amused himself for the better part of a weekend, taking apart a mid-band (162MHz) KXN1075A to figure out how it works. He reports that there are several discrete components and a thick-film hybrid part. He traced out the circuit, measured many of the components, and drew up this schematic (PDF). He then took apart a low-band (144MHz) unit to compare them, and managed to convert the mid-band unit to work with a suitable low-band crystal:
1) Remove crystal and C5.

2) Replace crystal with appropriate Fc = (F-17.9)/2 unit.

3) Remove windings on L2. Replace with 14 turns of #30
magnet wire (slightly larger than what's on there originally).

4) Tune L1 and L2 for peak at Fc.

5) Put in radio and tweakalize for best performance.

For the xmit CEs, Change C6 to 33pF. I used surface mount (1206) caps;
the board is meant to take a radial lead part with very fine spacing,
but the 1206 fits fine.
Ed is considering going into business converting CEs, since the mid-band ones are easy to find on ebay, but the low-band ones seem scarce. Either that, or we've joked about building a synthesized CE that would be user-programmable, possibly splicing into the channel switch connector and supplying up to 6 frequencies from one unit. If you think either of these ideas is interesting, drop me line... (also note that Bob KA4LMW at The Portable Clinic has both 8-channel and frequency synthesizer modules for the MT500.)


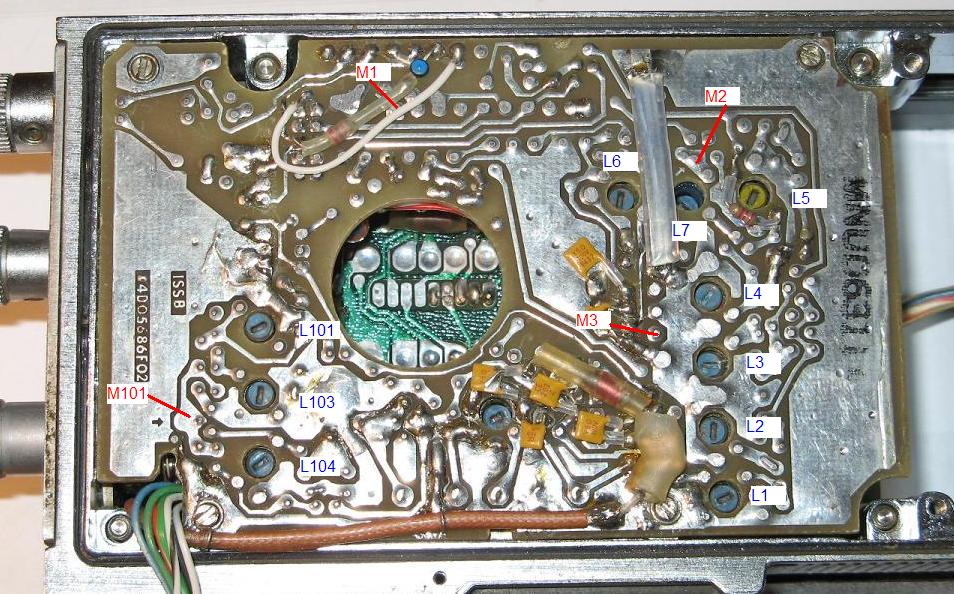
Step	Adjust	For		Measure	Note
1	L6,L7	max volts dc	M2	--
2	L1,L2,	max volts rms	M1	Inject carrier freq signal to antenna.
	L3,L4,L5			Adjust signal gen for indication on
					-30dBm scale of voltmeter. Adjust
					L1-L5 for peak at M1. Maintain
					voltmeter on -30dBm scale by reducing
					signal generator output.
3	CE1	Marked freq	M1	Reduce sig gen to minimum output.
					Inject 17.9MHz +/- 100Hz into
					crystal filter FL1 to produce at least
					10dB rise at M1. Count the low i-f
					frequency at M1. Record within 10Hz.
					Must be 35kHz +/- 1.5kHz.
					Turn off 17.9. Adjust generator to
					exact carrier freq and output for
					-40dbM at M1. Adjust CE1 to produce
					the previously recorded i-f freq
					within 50 Hz.
 -- alternate method --
3A	CE1	Marked freq	M1	Inject 17.9 into FL1. Adjust sig
					gen to read -40dBm at M1.
					Connect output of ac voltmeter to
					oscope. Set timebase to 5ms/div
					and gain to get about 3 div.
					Set sig gen to exact carrier freq.
					Increase output until scope shows
					an AM signal (the i-f resultant).
					Adjust to zero beat.
 -- alternate method --
3B	CE1	Marked freq	M1	Instead of oscope, listen to audio
					output. Increase sig generator until
					an audio tone is heard (the resultant).
					Adjust to zero beat.
4	Repeat step 3* for the remaining channel elements
L1 is at the lower right of the board with a hole for the speaker magnet (from the solder side). L2, L3 and L4 are directly above it in a line. L6, L7 and L5 then go from left to right, forming a T.
M2 is just above and to the right of the adjustment hole for L7.
M1 is above the speaker hole, just above three traces that cross horizontally. These traces connect (at their left end) into an array of 2x5 pads; counting left to right, M1 is the third pad.
Step Adjust For Measure Note 1 L101, max - volts dc M101 Repeat at least once to ensure L103 a maximum has been obtained. Typical value is -1.0VDC 2 L104 max power out antenna Repeat steps 1 & 2. L104 is the trimmer on top of U12. 3 L107 specified power antenna If CE103 is used, remove it to gain access to L107. For 5W radios, set L107 for 5W. For 2W radios, set L107 for 2.1W, then adjust U12 in direction of minimum current for 2W. Reinstall CE103 when complete. 4 CE101 marked freq antenna Freq counter through 30dB attenuator. 5 repeat step 4 for other channel elements (be sure to use the switch!) 6 PL deviation7 R211 +-5kHz dev antenna connect audio oscillator to mic input; set at 50mV rms at 1000 Hz. 8 repeat step 7 for other channel elements.
L104, L103 and L101 are at the left lower corner of the board, from bottom to top.
M101 is a large pad that connects left of L104 and L103. There should be a small arrow trace pointing at the pad.
| color dot | description |
|---|---|
| Yellow | 136-142 MHz |
| Green | 140-150.8 |
| Black | 150.8-162 |
| Blue | 162-174 |
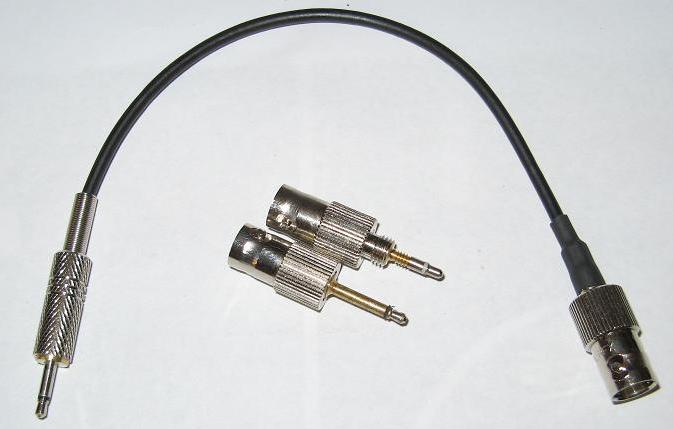
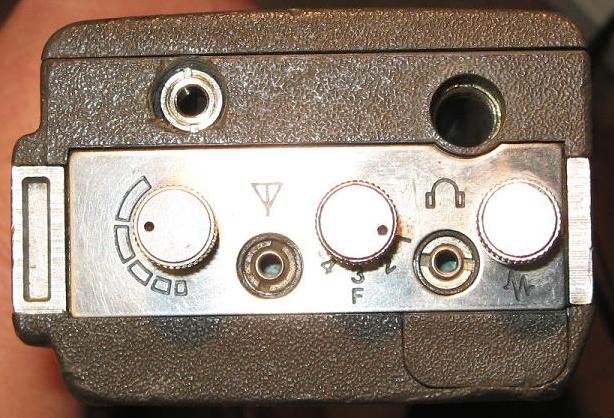
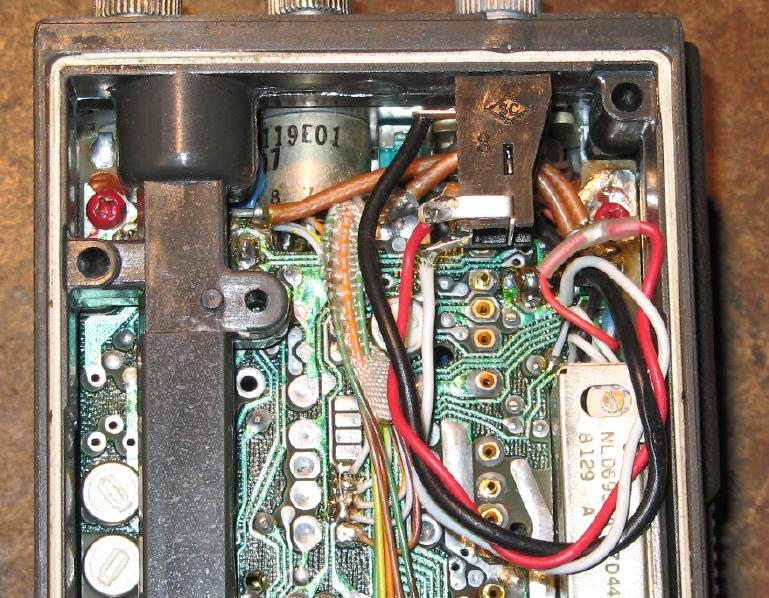
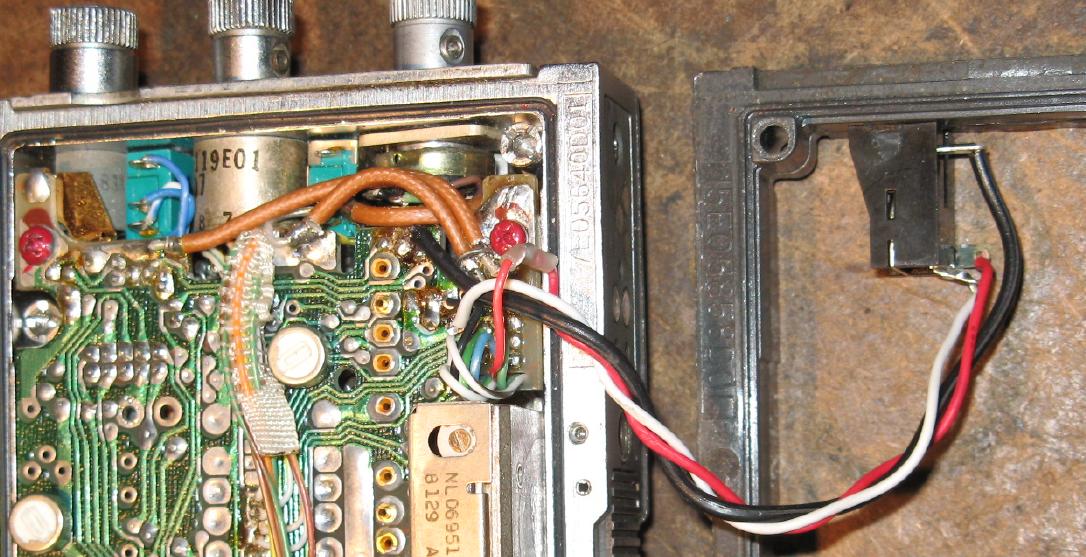 You can see the connections I used.
This works OK, but I have not yet found a satisfactory jack that is
a panel mount rather than a PC mount (which needs to be epoxied to the frame).
This one, which is a normal phone plug, has +12 on the tip, so it
shorts to ground when you pull it (or it wiggles free). Not good.
| Pin | signal | color |
|---|---|---|
| 1 | TX audio | orange |
| 3 | PTT | blue |
| 5 | RX audio | green |
| 6 | ground | black |
| 7 | B+ | red/white |
Back to my amateur radio page.
Last updated Oct 05 2011 by cak